
A Dockerfile is a blueprint for building Docker images. It’s a script composed of various commands and instructions used by Docker to automatically build a custom image.
Key Features
- Automated Image Creation: Dockerfiles automate the process of image creation, making it reproducible and consistent.
- Version Control Friendly: Being a text file, Dockerfiles can be version controlled, enhancing collaboration and track changes.
Creating a Basic Dockerfile
Let’s dive into creating a simple Dockerfile. We’ll create a Dockerfile for a basic Node.js application. The Docker file resides in the root directory of your project.
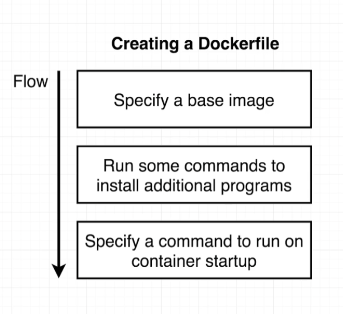
Step 1: Choose a Base Image
Every Dockerfile starts with a base image. This is the foundation of your Docker image and typically includes the operating system and some essential tools.
FROM node:14
Here, we’re using the official Node.js image with Node version 14 as our base.
Step 2: Set Working Directory
Setting a working directory helps in structuring your Docker image and is where your application code resides inside the container.
WORKDIR /app
Step 3: Copy Application Files
Now, we copy our application files into our Docker image.
COPY . /app
This command copies everything in the current directory to the /app directory in the image.
Step 4: Install Dependencies
For a Node.js application, we need to install dependencies defined in the package.json file.
RUN npm install
Step 5: Define the Command to Run the App
Finally, specify the command to run your application.
CMD ["node", "app.js"]
This command will start your Node.js application.
Building and Running Your Docker Image
With your Dockerfile created, you can now build the Docker image.
docker build -t my-node-app .
And run it:
docker run -d -p 3000:3000 my-node-app
Conclusion
Creating a Dockerfile is a foundational skill for working with Docker. It allows you to define, in code, how your application and its environment should be built.
,