Twitter has recently rolled out a series of improvements to its ad-tracking solution. The new Twitter Pixel is a website tag that is implemented on your website to track site actions or conversions. The docs for conversion tracking are found here. One thing the docs are unclear about is how to add event tracking to a React app.
The new Twitter Pixel is made up of two parts:
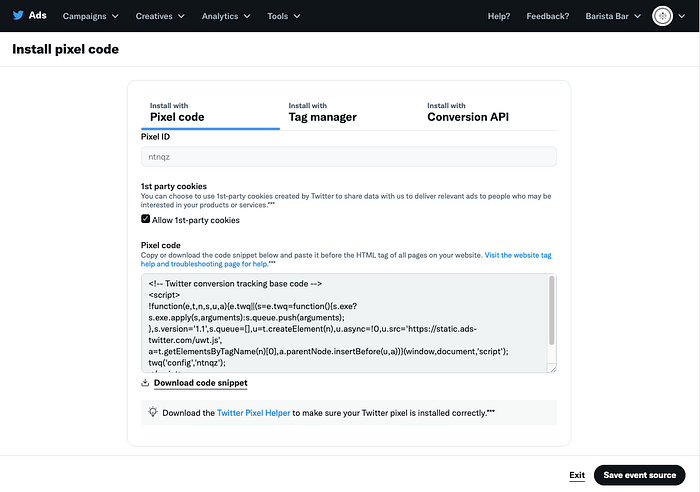
- Base code — similar to the Universal Web Tag, this should be implemented across all pages of your site. Any previously integrated Universal Web Tags are able to operate as the base code of the new Twitter Pixel. The base code tracks visits to a website and initializes the pixel so that you can track additional events via event code or create audiences using Audience Manager.
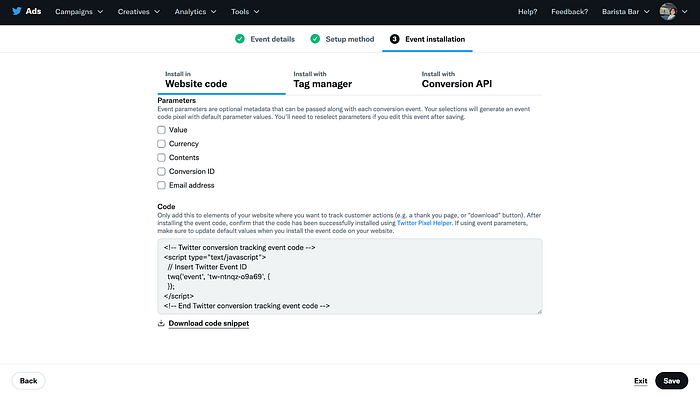
- Event code — requires the base code to be implemented. Similar to Single Event Tags, event code should be implemented in key locations (like an add-to-cart button). Any previously integrated Single Event Tags have been transitioned to operate as event code of the new Twitter Pixel. Event code allows you to track individual actions on your website, like Purchases.
- Follow the instructions in the documentation to get your tracking base code, like in the following image.
2. Follow the instructions to get your event code like this:
3. Initializing the Twitter tracking library:
export const initTwitter = () => {
  const head = document.querySelector('head');
  const addTwitterScript = () => {
    const twitterScript = document.createElement('script');
    twitterScript.type = 'text/javascript';
    twitterScript.async = true;
    twitterScript.src = 'https://static.ads-twitter.com/uwt.js';
    head.appendChild(twitterScript);
  };

// I've converted the base code into the following function which is more
// readable, this does the same thing as the code you copy from the console

const initializeTwq = (windowObj, documentObj, elementType) => {
    if (!windowObj.twq) {
      const twitterEventTracker = (windowObj.twq = (...args) => {
        twitterEventTracker.exe
          ? twitterEventTracker.exe.apply(twitterEventTracker, args)
          : twitterEventTracker.queue.push(args);
      });
      twitterEventTracker.version = '1.1';
      twitterEventTracker.queue = [];
      const twitterScriptElement = documentObj.createElement(elementType);
      twitterScriptElement.async = true;
      twitterScriptElement.src = 'https://static.ads-twitter.com/uwt.js';
      const a = documentObj.getElementsByTagName(elementType)[0];
      a.parentNode.insertBefore(twitterScriptElement, a);
    }
  };
  addTwitterScript();
  initializeTwq(window, document, 'script');
  window.twq('config', <YOUR PIXEL ID>);
};
The initTwitter function initializes the Twitter tracking library by injecting the tracking script into the document and configuring the tracking library with the specified Twitter Event ID.
4 . Sending the conversion event:
export const sendTwitterConversion = email => {
  if (!window.twq) {
    return;
  }
  window.twq('event', <YOUR EVENT ID>, {
    conversion_id: null,
    email_address: email,
  });
};
The sendTwitterConversion function sends the conversion event to Twitter, containing the user’s email address. Before sending the event, it checks whether the window.twq function is defined. If not, it returns without executing any action.
Usage: To use the code, follow these steps:
- Import the functions into your JavaScript file:
import { initTwitter, sendTwitterConversion } from './twitterTracking';
- Call the
initTwitter()function when the application starts or when a user visits a specific page:
initTwitter();
- Call the
sendTwitterConversion()function with the user’s email address when a conversion occurs:
sendTwitterConversion(userEmail);
By following this tutorial, you can easily implement Twitter ad conversion tracking in your web application.